
Wall art isn’t just decoration, it’s the finishing coat that turns a room from “done” to “designed.” While most homeowners obsess over paint swatches and furniture layouts, they often leave walls bare or settle for generic prints that don’t quite fit. The truth is, well-chosen wall art can establish focal points, balance proportions, and tie together color schemes in ways that furniture alone can’t achieve. Whether someone’s working with a cramped rental or a custom-built living room, understanding how to select, size, and place art makes the difference between a space that feels complete and one that feels like it’s still waiting for something.
Key Takeaways
- Interior design wall art transforms rooms by creating focal points, establishing mood, and tying together design elements that furniture alone cannot achieve.
- Proper sizing and scaling follows the two-thirds to three-quarters rule for furniture widths and the 57-inch center rule for optimal height placement, preventing art from looking like an afterthought.
- Modern spaces benefit from bold abstract pieces and frameless canvases, while traditional interiors call for oil paintings and ornate frames that respect architectural formality.
- Strategic placement on focal point walls (opposite the door or behind sofas) and underutilized spaces like hallways and staircases maximizes the visual impact of wall art.
- Color coordination with wall art works best through complementary schemes that echo one or two colors from the piece or deliberate contrasts against neutral palettes.
- Testing scaled images on walls before committing ensures colors translate properly in both morning and evening light, making it easier to integrate wall art into your existing design.
Why Wall Art Is the Secret to Elevated Interior Design
Wall art functions as the visual anchor that gives a room purpose and personality. In design terms, it creates focal points that guide the eye and establish hierarchy within a space. Without it, even well-furnished rooms can feel flat or institutional, think hotel lobbies versus thoughtfully curated homes.
From a practical standpoint, art fills vertical space, which is often underutilized in residential design. Most furniture sits below the 36-inch mark, leaving walls to do the heavy lifting when it comes to visual interest. A well-placed piece draws attention upward, making ceilings feel higher and rooms more expansive.
Art also serves as the bridge between disparate design elements. When someone’s working with a mix of wood tones, metal finishes, and fabric textures, the right piece can pull those colors and materials into a cohesive scheme. It’s why designers often select art early in the process, it sets the palette and informs subsequent choices.
Beyond aesthetics, wall art establishes the room’s intended mood. Abstract pieces in bold colors energize a space, while muted landscapes or black-and-white photography create calm. The scale and subject matter communicate whether a room is formal, casual, playful, or sophisticated before a single word is spoken.
Choosing the Right Wall Art Style for Your Home
Selecting art that complements existing design elements requires understanding both the room’s architectural features and its intended use. Style coherence doesn’t mean everything has to match, it means the art should feel intentional rather than random.
Modern and Contemporary Art for Minimalist Spaces
Modern and contemporary art thrives in spaces with clean lines, neutral palettes, and minimal ornamentation. Think open floor plans, flat-panel cabinetry, and simple window treatments. These environments benefit from art that makes a bold statement without adding visual clutter.
Abstract pieces work particularly well here. Large-scale canvases in monochromatic schemes or limited color palettes complement minimalist furniture without competing for attention. Geometric prints, line drawings, and photography with strong composition provide visual interest while maintaining the pared-down aesthetic.
Material matters in modern spaces. Metal wall sculptures, acrylic prints, and frameless canvases align with contemporary finishes like stainless steel, glass, and polished concrete. Avoid ornate frames or heavily textured pieces that clash with the streamlined look.
For those working with small minimalist spaces, like studio apartments or modern condos, a single oversized piece often works better than a gallery wall. It provides impact without the busyness that multiple smaller pieces create.
Traditional and Classic Art for Timeless Elegance
Traditional interiors, those featuring crown molding, wainscoting, hardwood floors, and classic furniture profiles, call for art that respects the room’s established formality. Oil paintings, gilded frames, botanical prints, and landscapes feel at home in these settings.
The frame itself becomes a design element in traditional spaces. Look for wood frames with decorative details, gold or silver leaf finishes, and substantial profiles that match the room’s architectural trim. A thin modern frame on classic art undermines the piece’s impact in a traditional room.
Subject matter should align with the space’s character. Portraiture, still life, classical landscapes, and architectural studies complement traditional design. For dining rooms, consider food-related art or formal botanical prints. In libraries or studies, maps, vintage book illustrations, or historical prints reinforce the room’s purpose.
Traditional doesn’t mean stuffy. A well-curated collection of antique prints in matching frames creates sophistication, while a single oversized classical piece makes a dramatic statement. The key is maintaining visual weight that matches the room’s substantial architectural features.
How to Size and Scale Wall Art Like a Professional Designer
Getting scale wrong is the fastest way to make art look like an afterthought. Designers use specific proportions to ensure art fits its space, and those ratios apply whether someone’s hanging a $50 print or a $5,000 original.
For wall art above furniture, the piece should span two-thirds to three-quarters of the furniture’s width. A 72-inch sofa calls for art that’s roughly 48 to 54 inches wide. Go smaller, and it looks tentative. Groupings of multiple pieces should meet this combined width.
Height placement follows the 57-inch center rule, the artwork’s center should sit at 57 inches from the floor, which approximates average eye level in galleries. Above furniture, leave 6 to 8 inches between the furniture’s top and the art’s bottom edge. This creates visual connection without crowding.
In rooms with high ceilings (10 feet or more), standard-sized art can get lost. Look for oversized pieces or vertical arrangements that fill the wall proportionally. A 16×20-inch print that works in an 8-foot room disappears in a 12-foot space.
Gallery walls require planning. Lay pieces on the floor first, maintaining 2 to 3 inches of space between frames. The overall arrangement should form a cohesive shape, usually a rectangle or loose grid, rather than scattered randomly. Use painter’s tape on the wall to map placement before hammering nails.
For narrow walls (like those beside windows or between doorways), vertical pieces work better than horizontal ones. A tall piece fills the space without overwhelming it, while a wide horizontal piece can make the wall feel cramped.
Placement Strategies That Make Wall Art Shine
Where art goes matters as much as what it looks like. Strategic placement enhances both the art and the room’s overall design.
Focal point walls are the first surfaces visible when entering a room, typically the wall opposite the door or the one behind a sofa. These prime spots deserve the most impactful pieces. Avoid placing statement art on walls that face windows, where backlighting reduces visibility and causes glare.
In open floor plans, use art to define zones. A large piece above a dining table establishes that area as distinct from the adjacent living space. This visual separation creates structure in rooms without walls.
Hallways and staircases offer underutilized opportunities for gallery walls or series of related pieces. In stairwells, maintain the 57-inch center rule by measuring from each step’s tread rather than the floor. This creates a diagonal line that follows the stairs’ ascent.
Avoid hanging art on exterior walls in humid climates or basements prone to moisture. Canvas and paper absorb humidity, leading to warping or mold. If those are the only options, use metal or acrylic pieces instead.
Lighting placement can make or break art visibility. Picture lights mounted to frames work for traditional pieces, while track lighting or adjustable recessed fixtures suit modern spaces. Aim for lights that sit at a 30-degree angle to minimize glare on glass-covered pieces. LED bulbs prevent heat damage that incandescent lights cause over time.
For hanging hardware, use wall anchors rated for the art’s weight in drywall, or mount directly into studs when possible. A stud finder costs $15–$30 and prevents pieces from tearing through drywall. For heavy pieces (over 20 pounds), use two mounting points rather than one for stability.
Color Coordination: Matching Wall Art to Your Interior Palette
Color makes or breaks the relationship between art and its surroundings. The goal isn’t perfect matching, it’s intentional coordination that either complements or deliberately contrasts with the existing palette.
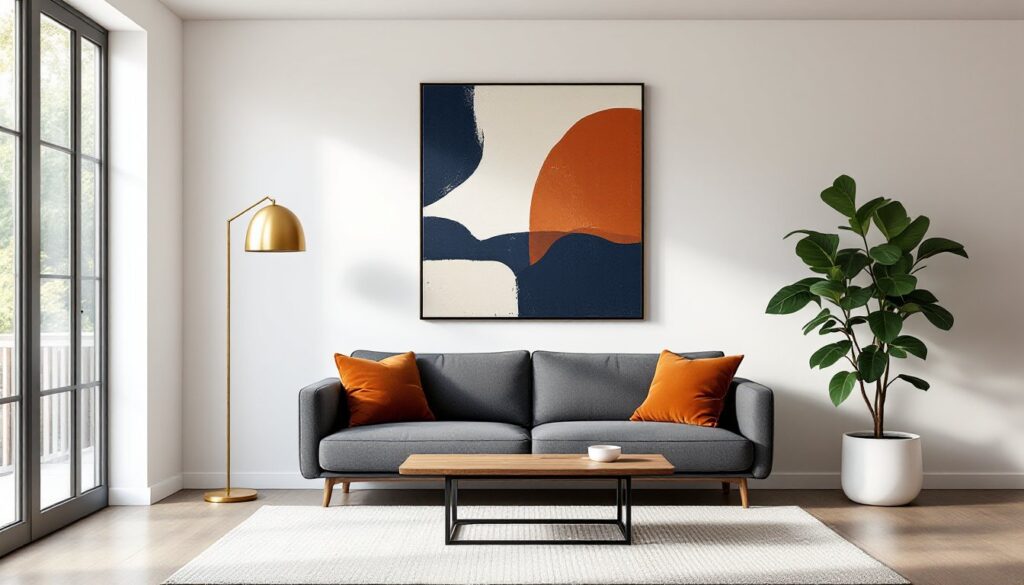
Complementary color schemes pull one or two colors from the art and echo them in the room’s textiles, accessories, or accent walls. If a painting features blue and rust tones, introduce those shades through throw pillows, rugs, or ceramics. This creates visual rhythm without being matchy-matchy.
Contrasting art works when the room’s palette is neutral. A bold, colorful piece pops against white, gray, or beige walls, becoming the room’s statement element. This approach requires confidence, the art needs to be strong enough to stand alone without competing colors.
For monochromatic rooms, look for art that adds tonal variation within the same color family. A room decorated in shades of blue benefits from art that introduces navy, teal, and powder blue rather than jumping to an entirely different hue.
Black-and-white photography or graphic prints function as neutrals, working in nearly any color scheme. They add visual interest without introducing new colors to manage, making them safe choices for DIYers uncertain about color coordination.
Test before committing. Many frame shops and online retailers offer printable templates or return policies. Print a scaled image, tape it to the wall, and live with it for a few days. Colors look different in morning light versus evening, and what works on a screen doesn’t always translate to the wall.
When working with existing collections or inherited pieces, let the art dictate the room’s palette rather than forcing it to fit. Pull paint swatches from the artwork’s dominant and accent colors, then build the room around those tones. This ensures cohesion and makes the art feel integral rather than added as an afterthought.