
A GE dishwasher that won’t start, leaves dishes grimy, or puddles water across the kitchen floor isn’t just an inconvenience, it’s a disruption to daily routines and a potential source of water damage. The good news? Many common GE dishwasher failures stem from a handful of predictable culprits, most of which homeowners can diagnose and fix without waiting days for a service call or shelling out hundreds in labor costs. This guide walks through the most frequent GE dishwasher problems, diagnostic steps anyone can perform, and proven repair methods that restore function quickly and safely.
Key Takeaways
- Many common GE dishwasher repair issues—including starting problems, poor cleaning, and leaks—can be diagnosed and fixed by homeowners without professional service calls.
- The most frequent GE dishwasher failures stem from door latches, thermal fuses, clogged spray arms, deteriorated gaskets, and hose leaks, each with predictable warning signs.
- Perform basic diagnostics before calling a pro: test power supply, check door latch continuity, inspect spray arms and filters for clogs, and observe where water leaks appear during a test cycle.
- Simple DIY repairs like replacing door gaskets, cleaning inlet screens, and tightening hose clamps can be completed with basic tools and typically cost $5–$50 in parts.
- Call a professional for electrical issues, control board diagnostics, major tub leaks, or complex motor and pump repairs that require disassembly and advanced appliance knowledge.
- If repair costs exceed 50% of a new dishwasher’s price, replacement may be more economical than repair, especially for units near the end of their 9–12 year lifespan.
Most Common GE Dishwasher Problems and Their Warning Signs
Understanding what typically goes wrong helps narrow down the issue before pulling tools from the drawer. GE dishwashers, like most brands, exhibit predictable failure patterns tied to specific components.
Won’t power on or start a cycle: Often the door latch or control board. If the unit shows no lights or sounds when the door closes, the door latch assembly may have failed. If lights appear but the cycle won’t initiate, the control panel or thermal fuse could be the issue.
Poor cleaning or cloudy dishes: Usually linked to clogged spray arms, a failing wash pump, or a worn-out detergent dispenser. White film or food residue that won’t budge points to water chemistry (hard water), blocked jets, or inadequate water temperature entering the tub.
Water pooling under the door or beneath the unit: Door gasket deterioration is the top cause for front leaks. Bottom leaks typically originate from the pump seal, a cracked hose, or a damaged sump assembly. Fresh puddles after each cycle signal an active seal or hose failure.
Won’t drain completely: A kinked drain hose, clogged air gap, or blocked garbage disposal connection stops water from exiting. If the dishwasher hums but water sits in the bottom, the drain pump or impeller may be jammed or burned out.
Unusual noises during operation: Grinding or rattling often means the wash arm bearings are worn, a utensil has fallen into the sump, or the pump impeller has debris caught in the blades. A high-pitched whine can indicate a failing motor bearing.
Recognizing these warning signs early prevents minor issues from escalating into costlier repairs or water damage to flooring and cabinetry.
How to Diagnose Your GE Dishwasher Issue Before Calling a Pro
Accurate diagnosis saves time and money. Before ordering parts or booking a service appointment, perform these checks to pinpoint the root cause.
Safety first: Turn off power at the circuit breaker, not just the door switch. Most dishwashers run on a dedicated 15- or 20-amp circuit. Shut off the water supply valve under the sink to prevent accidental flooding during inspection.
Check the basics: Confirm the door latches firmly, most models won’t start unless the latch engages the strike plate. Inspect the control panel for error codes: GE dishwashers sometimes flash LED sequences that correspond to fault codes in the owner’s manual. Test the outlet or hardwired connection with a multimeter to verify 120V AC is reaching the unit.
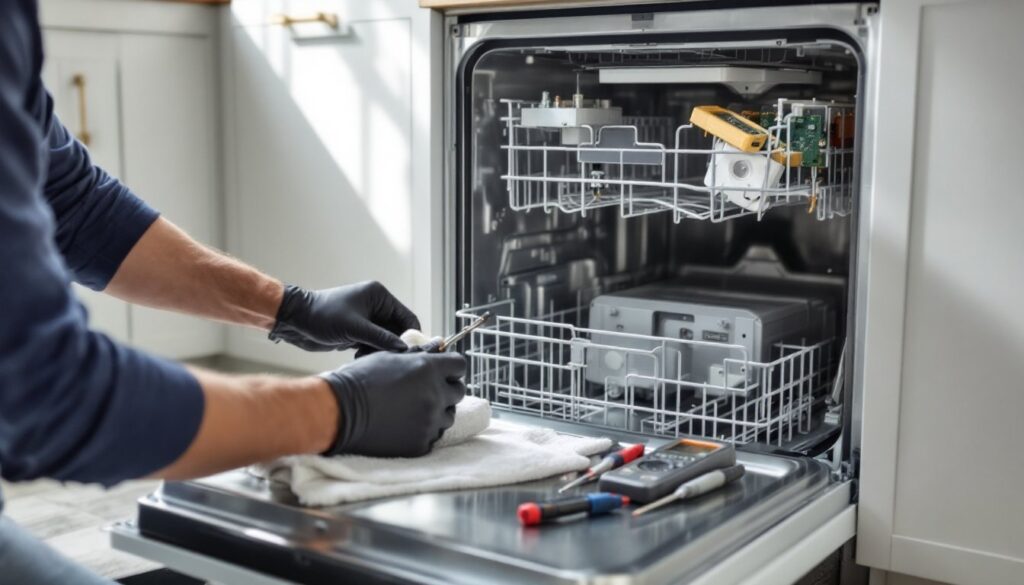
Inspect visible components: Open the door and remove the bottom rack. Pull out the lower spray arm (it typically twists off counterclockwise) and check all jets for clogs. Remove the filter assembly at the tub bottom and clean trapped debris, food particles, broken glass, and small utensils accumulate here. Examine the door gasket for cracks, warping, or missing sections.
Listen and observe during a test cycle: Restore power and water, then start a rinse cycle. Listen for the fill valve to click and water to enter. If the tub doesn’t fill, the inlet valve screen may be clogged or the valve solenoid failed. If water enters but the cycle doesn’t advance, the timer or electronic control may be faulty. Note where leaks appear and when, during fill, wash, or drain.
Use a multimeter for electrical testing: Test the door latch switch for continuity when the door is closed. Check the thermal fuse (usually located on the control board) for continuity, if it’s open, the dishwasher won’t start. Test the heating element terminals for continuity: a broken element won’t dry dishes and may prevent the cycle from completing.
This diagnostic routine identifies most failures without disassembling major components, guiding the decision to repair or call for help.
Step-by-Step Fixes for Frequent GE Dishwasher Failures
Dishwasher Won’t Start or Turn On
Tools needed: Screwdriver set (Phillips and Torx), multimeter, flashlight.
Materials: Replacement door latch assembly or thermal fuse, if needed.
- Verify power: Check the breaker and reset if tripped. Test voltage at the junction box or outlet with a multimeter.
- Test the door latch: Remove the inner door panel by unscrewing the perimeter screws (usually Torx T15 or T20). Locate the door latch assembly at the top edge. With the multimeter set to continuity, test the latch switch terminals with the door closed. No continuity means the latch must be replaced. Replacement latches for GE models run $25–$50 and snap or screw into place.
- Check the thermal fuse: The fuse is typically mounted on the control board or near the heating element. Test for continuity. If the fuse is blown (no continuity), it won’t reset, replacement is the only fix. A new fuse costs $10–$20 and installs with push-on terminals or screws.
- Inspect the control board: If latch and fuse test good but the unit remains dead, the electronic control board may have failed. Visual inspection for burn marks or swollen capacitors can confirm, but board replacement often requires professional diagnosis unless the homeowner is comfortable with electronics.
Safety note: Always disconnect power before opening panels or testing components. Capacitors on control boards can hold a charge even when power is off.
Poor Cleaning Performance or Dishes Still Dirty
Tools needed: Needle-nose pliers, small brush or toothpick, adjustable wrench.
Materials: Dishwasher cleaner, white vinegar, replacement spray arm (if damaged).
- Clean spray arms: Remove the lower and upper spray arms. Use a toothpick or small wire to clear each jet hole. Rinse under running water and reinstall.
- Inspect the wash pump and chopper blade: Remove the filter assembly and spray arm. Shine a flashlight into the sump area. Look for broken glass, twist ties, or labels that could jam the impeller. Carefully remove debris with needle-nose pliers.
- Check water temperature: Run the kitchen faucet until water is hot (at least 120°F), then start the dishwasher. Incoming water that’s too cold won’t activate detergent properly or dissolve grease.
- Examine the detergent dispenser: The spring-loaded door should pop open mid-cycle. If it sticks or won’t latch, residue buildup or a broken spring is usually the cause. Clean with vinegar or replace the dispenser assembly ($15–$30).
- Test water inlet valve flow: A clogged inlet screen reduces water pressure. Turn off water, disconnect the supply line from the valve (beneath the tub), and inspect the screen. Rinse or replace if clogged with sediment.
- Run a cleaning cycle: Pour two cups of white vinegar into the bottom of the empty tub and run a hot cycle. This removes mineral buildup and grease from internal components.
If these steps don’t resolve poor cleaning, the wash pump motor or circulation pump may be failing, both are component-level repairs best handled by a technician unless the homeowner has appliance repair experience.
Leaking Water from Door or Bottom
Tools needed: Screwdriver, towels, flashlight, utility knife.
Materials: Replacement door gasket, hose clamps, plumber’s grease.
- Inspect the door gasket: Run a finger along the entire gasket perimeter, checking for tears, hard spots, or gaps. If damaged, order a replacement gasket specific to the GE model number (typically $20–$40). Remove the old gasket by pulling it from the channel, clean the channel with soapy water, then press the new gasket into place. A thin coat of plumber’s grease helps it seat and seal.
- Check the door alignment: Close the door and observe the gap around the perimeter. If uneven, the hinges may need adjustment. Loosen hinge screws slightly, realign the door, and retighten.
- Trace bottom leaks: Pull the dishwasher out from under the counter (disconnect power and water first). Tip it back gently onto a towel and inspect the pump seals, hose connections, and sump area with a flashlight. Look for water trails or corrosion that indicate the leak source.
- Tighten or replace hoses: Drain and fill hoses attach with spring clamps or screw clamps. Tighten loose clamps or replace cracked hoses with reinforced dishwasher hose (available at hardware stores, typically $5–$10 per section).
- Inspect the sump and pump seals: If the pump housing shows water seepage, the internal seal has likely failed. Pump seal replacement requires disassembly and is a moderate-skill repair, consult the service manual or consider professional help if uncomfortable with appliance internals.
Safety note: Wear gloves when working around sharp edges inside the dishwasher tub. Water and electricity don’t mix, ensure power is off and the unit is fully drained before tipping or disassembling.
When to Call a Professional vs. DIY GE Dishwasher Repair
Some repairs are straightforward: others risk making the problem worse or voiding warranties. Here’s how to decide.
Safe for most DIYers:
- Replacing door gaskets, latches, and spray arms
- Cleaning filters, jets, and inlet screens
- Testing and replacing thermal fuses or door switches
- Tightening hose connections or swapping kinked hoses
Proceed with caution (moderate skill required):
- Control board replacement (requires careful handling of electronics and connectors)
- Drain pump or wash motor replacement (involves disassembly and potential water spills)
- Detergent dispenser actuator replacement (requires partial door panel removal)
Call a professional:
- Wiring faults or repeated breaker trips (potential electrical hazard)
- Major leaks from the tub itself (may indicate a cracked tub, which often means replacement)
- Warranty-covered repairs (DIY work can void coverage)
- Control board diagnostics beyond simple fuse or latch testing
- Pump or motor issues if uncomfortable with appliance disassembly
Cost considerations matter, too. A service call typically runs $100–$150 for diagnosis, plus parts and labor. If the repair estimate exceeds half the cost of a new dishwasher, replacement may be smarter. GE dishwashers generally last 9–12 years: units near the end of that lifespan with multiple failing components are often better replaced than repaired.
DIY repairs save labor costs but require honest assessment of skill and comfort with electrical and mechanical systems. When in doubt, prioritize safety and long-term reliability over short-term savings.