
Blank walls don’t need to shout to make an impact. Minimalist wall decor strips away the clutter and leaves behind intentional, functional design, no tchotchkes, no visual noise, just clean lines and thoughtful placement. This approach works in any room, from a cramped apartment bedroom to a vaulted living room, because it prioritizes quality over quantity and lets architecture breathe. Whether someone’s working with drywall, plaster, or textured surfaces, the right minimal pieces enhance space instead of overwhelming it. Here’s how to execute minimalist wall decor without sacrificing personality or making a room feel cold.
Key Takeaways
- Minimalist wall decor emphasizes quality over quantity by using intentional placement and negative space, making individual pieces stand out without visual clutter.
- Simple line art, oversized mirrors, and floating shelves are core elements of minimalist wall decor that function as both design features and practical solutions.
- Proper installation matters: use a stud finder for heavy items, mount artwork at 57–60 inches from the floor, and ensure shelves are level with appropriate anchors rated for weight capacity.
- Natural materials like woven wall hangings, driftwood, and wall-mounted plants add texture and warmth to minimalist spaces while maintaining a clean, curated aesthetic.
- A monochromatic gallery wall with 3–5 pieces in consistent frame styles and cohesive content creates visual interest without the chaos of multi-colored arrangements.
- Minimalist wall decor ages better than trend-heavy designs, requires less maintenance, and adapts to any room size by prioritizing strategic placement over filling every vertical inch.
Why Minimalist Wall Decor Works in Any Room
Minimalist wall decor succeeds because it emphasizes negative space, the empty areas around objects, which gives the eye room to rest and makes individual pieces stand out. In design terms, this creates visual hierarchy without competing focal points. A single statement piece on a 10-foot wall draws more attention than five smaller frames scattered around it.
This approach also adapts easily to different room functions and sizes. In a small bedroom or narrow hallway, fewer wall-mounted items prevent the space from feeling cramped. In larger rooms with high ceilings, strategic placement of minimal decor maintains scale without requiring a homeowner to fill every vertical inch. It’s practical, not trendy.
From an installation standpoint, minimalist decor simplifies the job. Hanging one oversized canvas or a few floating shelves requires fewer pilot holes, less patching, and less time measuring. Most pieces use standard drywall anchors or toggle bolts rated for 20–50 pounds, depending on the item’s weight. Always locate studs with a stud finder for heavier installations, drywall alone won’t support a 3-foot wood shelf loaded with books.
Finally, minimalist walls age better. Trend-heavy gallery walls with dozens of frames look dated faster than a single piece of timeless line art or a well-chosen mirror. Maintenance is easier too: fewer items mean less dusting and simpler repainting when the time comes.
Simple Line Art and Abstract Prints
Line art, drawings made from continuous, unbroken lines, and abstract prints fit minimalist spaces because they’re visually light but conceptually strong. A single black-and-white line drawing of a face, plant, or geometric shape provides a focal point without introducing color clutter or complex detail.
When selecting prints, consider the frame material and mat width. A thin black metal frame (typically ½ to ¾ inch wide) keeps the focus on the artwork and suits modern or industrial interiors. Natural wood frames in light oak or ash work in Scandinavian-inspired spaces. Skip ornate molding or wide decorative frames, those fight the minimalist aesthetic.
Mat boards create breathing room around the print. A 2- to 3-inch white or off-white mat prevents the image from feeling cramped inside the frame. For frameless prints, mount them on foam core backing and use poster rails or magnetic hangers for a floating effect.
Hanging height matters. The center of the artwork should sit at 57 to 60 inches from the floor, which approximates average eye level. Use a laser level or painter’s tape to mark placement before driving any holes. For lightweight prints (under 5 pounds), a single nail or picture hanging hook works. Heavier framed pieces need two hooks spaced along the frame’s wire or D-rings to prevent tilting.
Print size should relate to wall size. On an 8-foot wall, a single 24-by-36-inch print feels intentional. Anything smaller risks looking like an afterthought. If grouping multiple line art pieces, keep spacing consistent, 4 to 6 inches between frames, and align them by top edge or centerline.
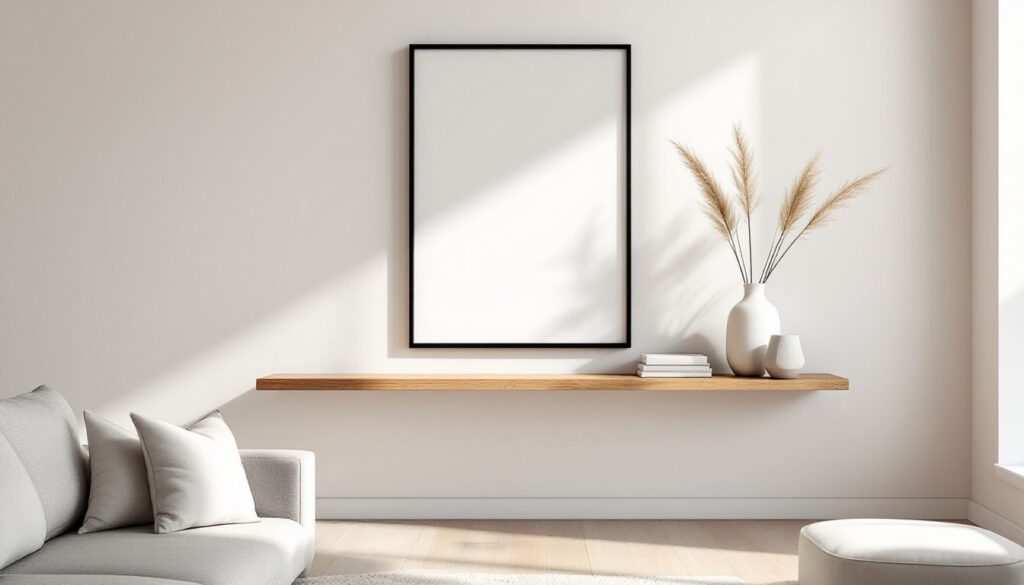
Floating Shelves as Functional Wall Art
Floating shelves serve double duty: they display objects and act as horizontal design elements that break up blank walls. In minimalist spaces, one or two shelves styled with restraint outperform a cluster of decorative-only items.
Choose shelves based on the wall’s structure. For drywall, locate studs and attach shelves directly with 3-inch wood screws into the framing. Standard 16-inch on-center stud spacing accommodates most shelf brackets. If studs aren’t where the design needs them, use toggle bolts or heavy-duty drywall anchors rated for the shelf’s weight plus contents. A 1-by-6-inch pine board (actual dimensions: ¾ by 5½ inches) spanning 3 feet can hold 20–30 pounds safely when properly anchored.
Material choice affects the look. Solid wood (oak, walnut, maple) adds warmth. Powder-coated steel or aluminum shelves suit industrial or modern spaces. Avoid plastic or particleboard, they sag under moderate weight and read as cheap.
Styling matters as much as installation. On a minimalist shelf, less is more: a single sculptural vase, a small potted succulent or snake plant, and one matte-finish object (ceramic bowl, geometric bookend) create balance. Leave at least one-third of the shelf surface empty. Overcrowding defeats the purpose.
Install shelves at functional heights. In a kitchen, 18 to 24 inches above a countertop works for daily-use items. In a living room, 12 to 18 inches above a sofa back keeps them visible without risking head bumps. Use a 48-inch level during installation to ensure the shelf doesn’t slope, uneven shelves telegraph sloppy work.
Oversized Mirrors for Light and Space
An oversized mirror, anything 3 feet or larger in one dimension, expands perceived room size and reflects natural light, both core minimalist goals. Placement and secure mounting are critical because mirrors are heavy and dangerous if they fall.
Before buying, measure the wall and surrounding furniture. A floor-to-ceiling leaning mirror (common sizes: 65 by 24 inches or 72 by 30 inches) needs at least 3 inches of clearance from baseboards and nearby pieces. Wall-hung mirrors should leave 4 to 6 inches of space from furniture edges to avoid a cramped look.
For wall-mounted mirrors over 20 pounds, locate studs and use heavy-duty picture hangers or a French cleat system. A French cleat, a beveled strip of wood or metal, distributes weight evenly and prevents the mirror from shifting. One piece attaches to the wall (into studs), the other to the mirror’s back. They interlock for a flush, secure mount. For mirrors exceeding 40 pounds, install two cleats or consult the manufacturer’s mounting hardware.
Safety film applied to the mirror’s back prevents glass from scattering if it breaks. This is especially important in homes with children or in earthquake-prone regions. It’s a $10–$15 roll available at hardware stores and takes 15 minutes to apply.
Frame style should stay simple. Frameless mirrors with polished edges suit ultra-minimal interiors. Thin black or brushed metal frames add definition without bulk. Avoid decorative frames with scrollwork or wide profiles, they clash with minimalist principles.
Position mirrors to reflect something worth seeing: a window, a piece of art, or an architectural detail. Don’t hang them opposite cluttered areas or blank walls, they’ll just double the mess or emptiness.
Natural Elements and Textured Wall Hangings
Natural materials, wood, stone, fiber, and plants, introduce texture and warmth to minimalist walls without adding color chaos or visual clutter. These elements ground a space and prevent it from feeling sterile.
Woven wall hangings made from jute, cotton rope, or linen add softness and acoustic absorption. Look for pieces with simple geometric patterns or solid neutral tones (cream, beige, charcoal). Avoid complex macramé with dozens of knots, it fights the minimalist vibe. Hang them using a wooden dowel or metal rod threaded through the top weave, then mount the rod to the wall with two small hooks or nails.
Driftwood, reclaimed barn wood, or live-edge slabs work as horizontal wall art. A single 4-foot piece of weathered wood mounted above a sofa or bed creates organic interest. Secure it with L-brackets or keyhole hangers screwed into the wood’s back, then hung on wall anchors or studs. Sand any rough edges to prevent splinters, but leave the natural finish intact, don’t stain or paint it.
Wall-mounted planters bring living texture indoors. Air plants (Tillandsia) need no soil and thrive in minimal care conditions. Mounted staghorn ferns or small pothos vines in ceramic or concrete planters add greenery without sprawl. Install planters with appropriate anchors, ceramic is heavy when wet, and ensure there’s no risk of water damage to drywall. Use planters with drainage trays or opt for sealed vessels.
Stone or concrete wall tiles applied as accent panels offer texture without pattern overload. A 2-by-3-foot section of stacked stone or smooth concrete board behind a floating shelf creates depth. Install with construction adhesive rated for vertical surfaces and follow manufacturer instructions for weight limits.
Monochromatic Gallery Walls Done Right
A monochromatic gallery wall uses multiple frames or objects in a single color family, usually black, white, gray, or natural wood tones, to create visual interest without the chaos of multi-colored arrangements. Done right, it’s curated. Done wrong, it’s still clutter.
Start by selecting 3 to 5 pieces maximum. More than that risks overcrowding. Mix sizes for variety: one large piece (24 by 36 inches), two medium (16 by 20 inches), and one or two small (8 by 10 inches). Keep frame styles consistent, all thin black metal, all natural wood, or all frameless. Mixing frame materials dilutes the minimalist effect.
Layout the arrangement on the floor first. Use kraft paper templates cut to frame sizes and tape them to the wall to test placement before making holes. The goal is balanced negative space, gaps between frames should feel intentional, not random. A common grid layout uses uniform spacing of 2 to 3 inches between all frames. An asymmetric layout clusters pieces with varied spacing but maintains alignment along one or two invisible horizontal or vertical lines.
Hang the largest piece first at the center or focal point, then build around it. Use a laser level to keep horizontal and vertical edges true. For a gallery wall, a picture hanging template kit or a roll of painter’s tape simplifies the job, mark all nail positions before driving any holes.
Content should be cohesive: all black-and-white photography, all line drawings, or all abstract prints. Don’t mix family photos with abstract art, it muddles the theme. In minimalist design, coherence beats variety.
If the wall texture is rough (like orange peel drywall), consider float-mounting prints behind acrylic for a sleek, modern finish. This method uses standoffs or clips that hold the print ¼ inch off the wall, creating subtle shadow lines.
Conclusion
Minimalist wall decor isn’t about leaving walls empty, it’s about choosing the right pieces and placing them with intention. Whether it’s a single oversized mirror, a pair of floating shelves, or a small gallery wall, each element should earn its place. Measure twice, use the right anchors, and don’t be afraid of negative space. The result is a room that feels open, deliberate, and built to last.